Hunting Trail Camera Tips and Tricks
 Dec 06,2022

 Ausek
Ausek
Cultivate your hunting habits
A trail camera can be a hunter’s best friend, but if used improperly they can also be your worst enemy. The risk in using trailcams lies in the hunters’ addiction to looking at the photos too often. So the question then becomes, when should you check your cameras?
The answer is as infrequently as possible. Every trip in to a hunting property to check cameras puts pressure on the local deer, just as if you were hunting them. This pressure can eventually lead to local bucks going nocturnal or relocating.
That said, there’s not much point to using game cameras if you don’t ever find out what they’re capturing. If you need to check a camera, try to coordinate the task with a hunt, when you can simply walk by a camera on the way to your stand. Another option is to place cameras in locations where you can drive up to them when routinely traveling your property. Spots like field edges, logging roads, or an ATV path are all good options.
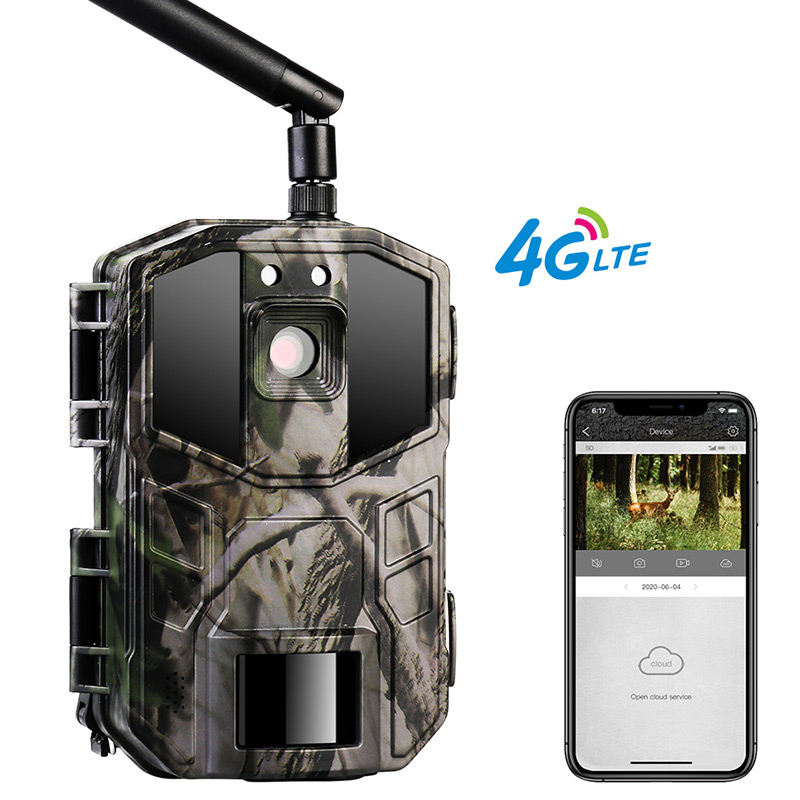
Ausek Trail camera for your reference.
Hunting Trail Camera Tips and Tricks
It's no secret that trail cameras are an incredibly helpful and effective tool. But, to get the best results, they must be used properly. Better images equal better information, which, in turn, gives you a better chance of being successful this coming season and coming home with a trophy animal.
Below you will find five trail camera tips and tricks that will up your hunting game.
1. North Facing is Best
As a child, you were probably advised to never look at the sun. The same rule goes for trail cams. While the consequence isn’t nearly as damaging, east or west-facing trail cameras won’t give you a great picture because of the sun. Moreover, because trail cameras are sensitive to movement (wind blowing through trees and bushes) and heat (blaring sun rays), it might become triggered. Valuable memory card space is now full of images of the forest with sun rays peaking through instead of deer. While these pictures are beautiful, they aren’t what you’re looking for or helpful. Avoid these issues by facing your trail camera north as often as possible.
2. Buy Better Batteries
When it comes to batteries for your trail camera, it’s best to splurge on higher quality, longer-lasting ones. Skip using the cheap, alkaline batteries and buy the lithium batteries. Because lithium batteries tend to last twice (or thrice!) as long, you’ll save money in the long run.
3. Set It and Leave It
A big mistake many hunters make is checking their trail camera too often. We understand it’s almost better than Christmas morning, looking at all the images on your memory card. However, it is important to leave it alone as not to scare off the wildlife in the area. The less you visit your camera’s location, the better results you’ll get.
4. Find an Ideal Location
Whether you’re buying a new home or finding a spot to set up your trail cam, location is everything. Even if you have the best trail camera money can, if your cam isn’t in a good place, your images won’t amount to much. Always think about where the animals are looking for food and water, trails and pathways were they’ll walk, and where they will rest for the night. Find a place to put your camera near one of these areas, and you’re sure to find the action.
5. Protect Your Property
Unfortunately, we live in a world where if things aren’t securely fastened, they can quickly disappear. To ensure your trail cam remains put, consider putting your camera in a lockbox. Or you can always put it somewhere out of sight or up high where it’s difficult to reach.
Ausek Trail camera for your reference: https://www.ausekcamera.com/


 Home
Home After purchasing an action camera,there are several steps you should do
  You May Also Like


 Tel
Tel
 Email
Email
 Address


